Saturday, April 23, 2011
Steampunk: Back in time (PTU kit)
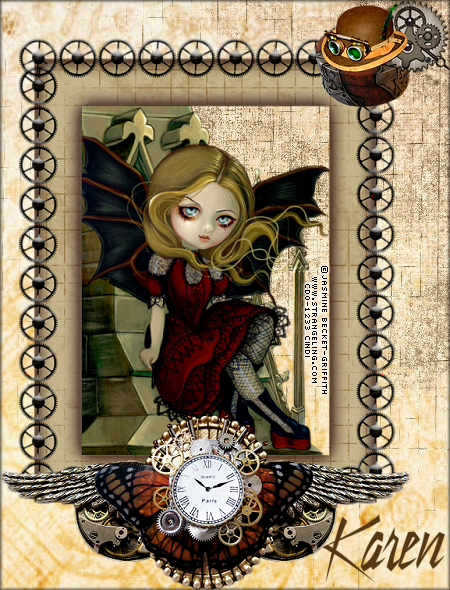
For this tag I used Paint Shop Pro 9 it should work with any version of the program. Any resemblance to any other signature or tutorial is not intended and merely coincidental
You will need the “Steampunk: Back in time ” tagger scrap kit by Sweet Occasion designs. You can get it from Lollipops n Gumdrops.
You will also need a tube of choice I used beautiful artwork of Jasmine Becket-Griffith Please do not use the same tubes without proper license. I used the Turbulence ahead template by Dee.
To start download the scrap kit unzip it, download your template, and pick your tube.
Open your template hit shift+d to duplicate your template save this template as a psp file called whatever you want your completed tag to be called. Delete raster 2. Delete the Deco layer and the skull layer. In your layers palette lock your layers together. Locking the three turbulence layers and the ahead layer with a 2. Save.
Open paper8 make the bottom frame background layer active selections>select all, Selections> float, Selections> defloat, selections> modify>expand by 1 hit delete on your keyboard, copy and paste paper8 into selection, selections> select none. Move the slider so that the opacity is 76%.
Give the bottom square frame layer a glow.
Open paper7 make the bottom rectangle layer active, selections>select all, Selections> float, Selections> defloat, selections> modify>expand by 1 hit delete on your keyboard, paste paper7 into selection, selections> select none. Save.
Open emjay_steampunkclock make the bottom circle layer active selections>select all, Selections> float, Selections> defloat, selections> modify>expand by 1 hit delete on your keyboard paste your clock into selections, selections> select none. Delete the bottom circle frame.
Open paper2 make oval overlay layer active, selections>select all, Selections> float, Selections> defloat, selections> modify>expand by 1 hit delete on your keyboard paste paper 2 into the selection, selections> select none.
Give the oval black border a glow.
Open paper8 make the top frame background layer active selections>select all, Selections> float, Selections> defloat, selections> modify>expand by 1 hit delete on your keyboard, copy and paste paper8 into selection, selections> select none. Move the slider so that the opacity is 76%.
Give the top square frame a glow.
Open paper7 make the top rectangle layer active, selections>select all, Selections> float, Selections> defloat, selections> modify>expand by 1 hit delete on your keyboard, paste paper7 into selection, selections> select none. Save.
Open emjay_steampunkclock make the top circle layer active selections>select all, Selections> float, Selections> defloat, selections> modify>expand by 1 hit delete on your keyboard paste your clock into selections, selections> select none. Delete the white circle frame top.
Make the turbulance3 layer active adjust> hue and saturation> colorize Hue 13 saturation 66. Do the same for turbulance1 layer. Now on the turbulance1 layer adjust> add/remove noise> add noise Gaussian, monochrome 50%
Now on the Now on the ahead layer adjust> add/remove noise> add noise Gaussian, monochrome 50%
Paste your tube as a new layer. Make your oval black border layer active, use your magic wand to select inside the frame, selections> modify>expand by 5, go back to your tube layer use your freehand selection tool to make your selection around the top of your tube larger I kept all of the tubes head and the air balloons. Selections>invert, hit delete. Give your tube a glow and then move the layer below the three turbulence layers.
Add any other elements from the kit you want to when you are happy with the placements hide or delete the raster1 layer, Merge visible. Resize the tag to 450 pixels wide making sure the resize all layers box IS checked; sharpen.
Add your name, adjust> add/remove noise> add noise Gaussian, monochrome 50%.
Add the copyright information for the tube you used. Save the clear background as a png. Congratulations you have finished another tag!!
If you need help with this tutorial please feel free to contact me at iceholecyn(at)gmail.com change the (at) to @ to make the email work =D
Feel free to show off what you have created with this tutorial at the same email address. Please comment if you used this tutorial I would love to know if this was helpful to anyone =D Thanks for trying my tutorial!
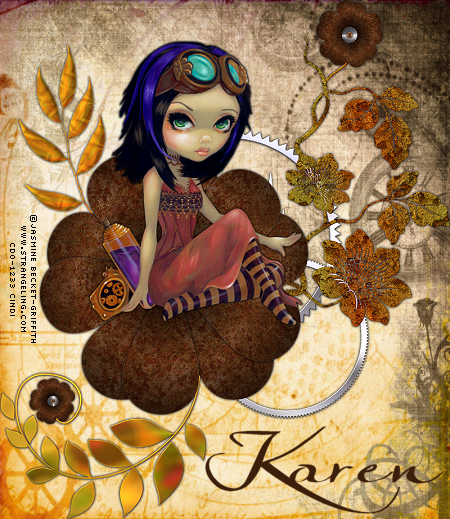
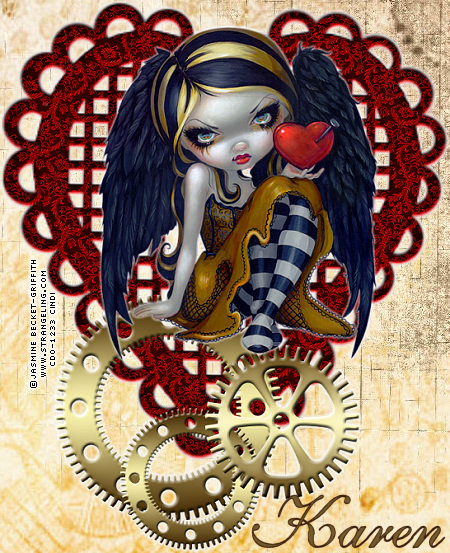
This kit has so many amazing cluster frames and elements that I made a few different tags I will show them below.
Labels:
Brown,
Jasmine Becket-Griffith,
Lollipops n Gumdrops,
Steampunk,
tags,
tutorial
Subscribe to:
Post Comments (Atom)
About Me
- Cindi
- I am married to my high school sweetheart. We have been together since 1994. We have one amazing little girl who makes everyday an adventure!
Labels
- Alika's Scraps (5)
- Ann (2)
- Avi (1)
- Black (7)
- Blue (4)
- Brown (3)
- Christmas (1)
- Creative Intentionz (1)
- Creatively Scrappin Blog Train (2)
- CU (2)
- Cuddly Rigor Mortis (1)
- Daniel Esparza (1)
- Dee'sSign Depot Dangerously Delicious Designz (1)
- Fabulous Art Beginnings (1)
- FallnAngel (2)
- Freebie (1)
- Gary Rudisill (1)
- Green (6)
- Jasmine Becket-Griffith (3)
- KT Bryan (1)
- Lady Mishka (1)
- Lollipops n Gumdrops (2)
- Myka Jelina (2)
- O'Scrap Candy Shack (1)
- Orange (2)
- Owl (1)
- Pink (8)
- Pinup Toons (2)
- Purple (3)
- Red (3)
- Sale (1)
- Steampunk (2)
- Suzanne Woolcott (1)
- tags (14)
- template (2)
- ThePSProject (1)
- tutorial (13)
- Weescotslass Creations (1)
- Wicked Princess (4)
- Zlata M (1)
Followers
T.O.U.
OK so for now I am going to keep it simple.
Please email me if you have any questions regarding usage which is not answered. Contact: iceholecyn@gmail.com
If you want a tag or stat I have displayed PLEASE contact me I save most of my templates.
If you want to share my work with your friends and family, send them a link to my blog so they can download for themselves.Just copy and paste my URL http://iceholecyn.blogspot.com/
You MAY NOT:* Claim my work as your own.* Alter any of my work and claim as your own original creation.* Upload my work to any website or file hosting site as downloads.
My CU items simply require a credit as a part of your kit. IF you are feeling generous you can send me a free copy of your kit :D
Thank you!
Cindi aka IceHoleCyn



0 comments:
Post a Comment